![]() Recap
and helpful hints:
Recap
and helpful hints:
1. Many labs will leave one or more Pouring Jigs set up to pour only Triple Tray impressions. Once everything is aligned, the only adjustment left may be to move the Swivel Table up or down a little.
2. The Stand Extension must be
removed in order to line up the
Swivel Table with two Large
Opposing Bases as described on
page 7 of this section because it
will not raise far enough with the
Stand Extension in place.
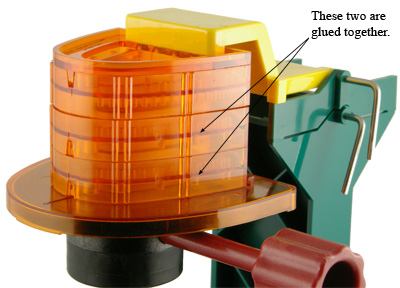
However; it is possible to align the
Swivel Table with the Stand
Extension in place by glueing two
Large Opposing Bases together and
attaching them to the Opposing
Index-Plate when needed.
3. When
pouring the opposing side, try to align the impression as accurately as
possible to the Pin-Locator before the stone sets. Raising the Swivel
Table until the tips of the Pin-Locator
are very close to the preps will help. The Swivel Table can
always be adjusted up or
down
before pouring the die side of the impression to establish
the desired 2 to 3mm distance from
the margins of the teeth and the tip
of the Pin-Locator pins.
![]() Weighing
the stone and measuring the water for each mix will help guarantee
quality and consistency. Working with the same consistency each time is
very important, as you will become proficient more quickly. You do
not want an overly runny mix when pouring the impression and coating the
pins on the base.
Weighing
the stone and measuring the water for each mix will help guarantee
quality and consistency. Working with the same consistency each time is
very important, as you will become proficient more quickly. You do
not want an overly runny mix when pouring the impression and coating the
pins on the base.
![]() Hold
stone model and not the plastic base when separating
models from the impression, this will reduce chances of separating the stone
model from the plastic base.
Hold
stone model and not the plastic base when separating
models from the impression, this will reduce chances of separating the stone
model from the plastic base.
Home Page > 1 2 3 4 5 6 7 8 9 10 11 12 13 14 15 16 17 18 19 20 21