After the stone has initially set, use an instrument to remove the excess.
Double check alignment of the Pin-Locator to the impression after trimming away excess stone.
![]() Be
careful when trimming excess stone so as not to move the impression.
At this point, if the impression is in the correct position no further
adjustments to the Pouring Jig will be needed, and the RTP_Base and the
Opposing_Base will be in perfect alignment with each other after the die side is poured.
Be
careful when trimming excess stone so as not to move the impression.
At this point, if the impression is in the correct position no further
adjustments to the Pouring Jig will be needed, and the RTP_Base and the
Opposing_Base will be in perfect alignment with each other after the die side is poured.
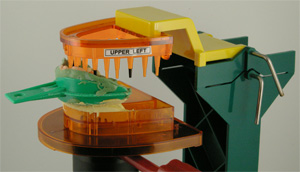
After the opposing stone has set, remove the Pin-Locator and replace it with the correct RTP_Base.
If the Pin-Locator was orange (large) then the RTP_Base should also be orange.
If the Pin-Locator is an upper then the RTP_Base should be an upper. Verify part type by checking engraving on die surface of RTP_Bases between the first and second molar.
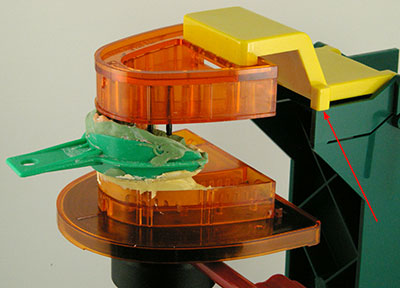
Insert die pins into the RTP_Base. Use stainless steel
die pins for prepped and contacting teeth. Use plastic pins for pontics
and non-critical areas. Rotate the Swing-Arm to bring the RTP_Base into
position. The impression may need additional trimming to bring the yellow
"stops" of the Swing-Arm into contact with the green Swing-Arm Stand (see
red arrow in above picture). Double check
to make sure all pins are in the correct locations. Also check to insure
the Jack Stand Release Handle is "up" (locked position) and that the
Swivel Table Knob is adequately tightened (1/4 turn in CW direction is
all that is necessary).
Home Page > 1 2 3 4 5 6 7 8 9 10 11 12 13 14 15 16 17 18 19 20 21